- Python 54.4%
- JavaScript 44.5%
- CSS 0.7%
- HTML 0.4%
| Filename | Latest commit message | Latest commit date |
|---|---|---|
|
|
||
| smart-thermostat | ||
| tests | ||
| .gitignore | ||
| api.py | ||
| auto_reboot.py | ||
| cooling_lockout.py | ||
| HANDOFF-2026-04-21-remote-thermostat.md | ||
| README.md | ||
| settings.json.example | ||
| status_sync.py | ||
| thermostat.py | ||
| weather_fetch.py | ||

PyThermostat: Pro-Grade DIY Smart Thermostat
A professional-grade, open-source smart thermostat built with Python (FastAPI) and React. Designed to run on a Raspberry Pi, this system provides standard HVAC control plus weather-aware automation, analytics, and a modern dashboard UI.
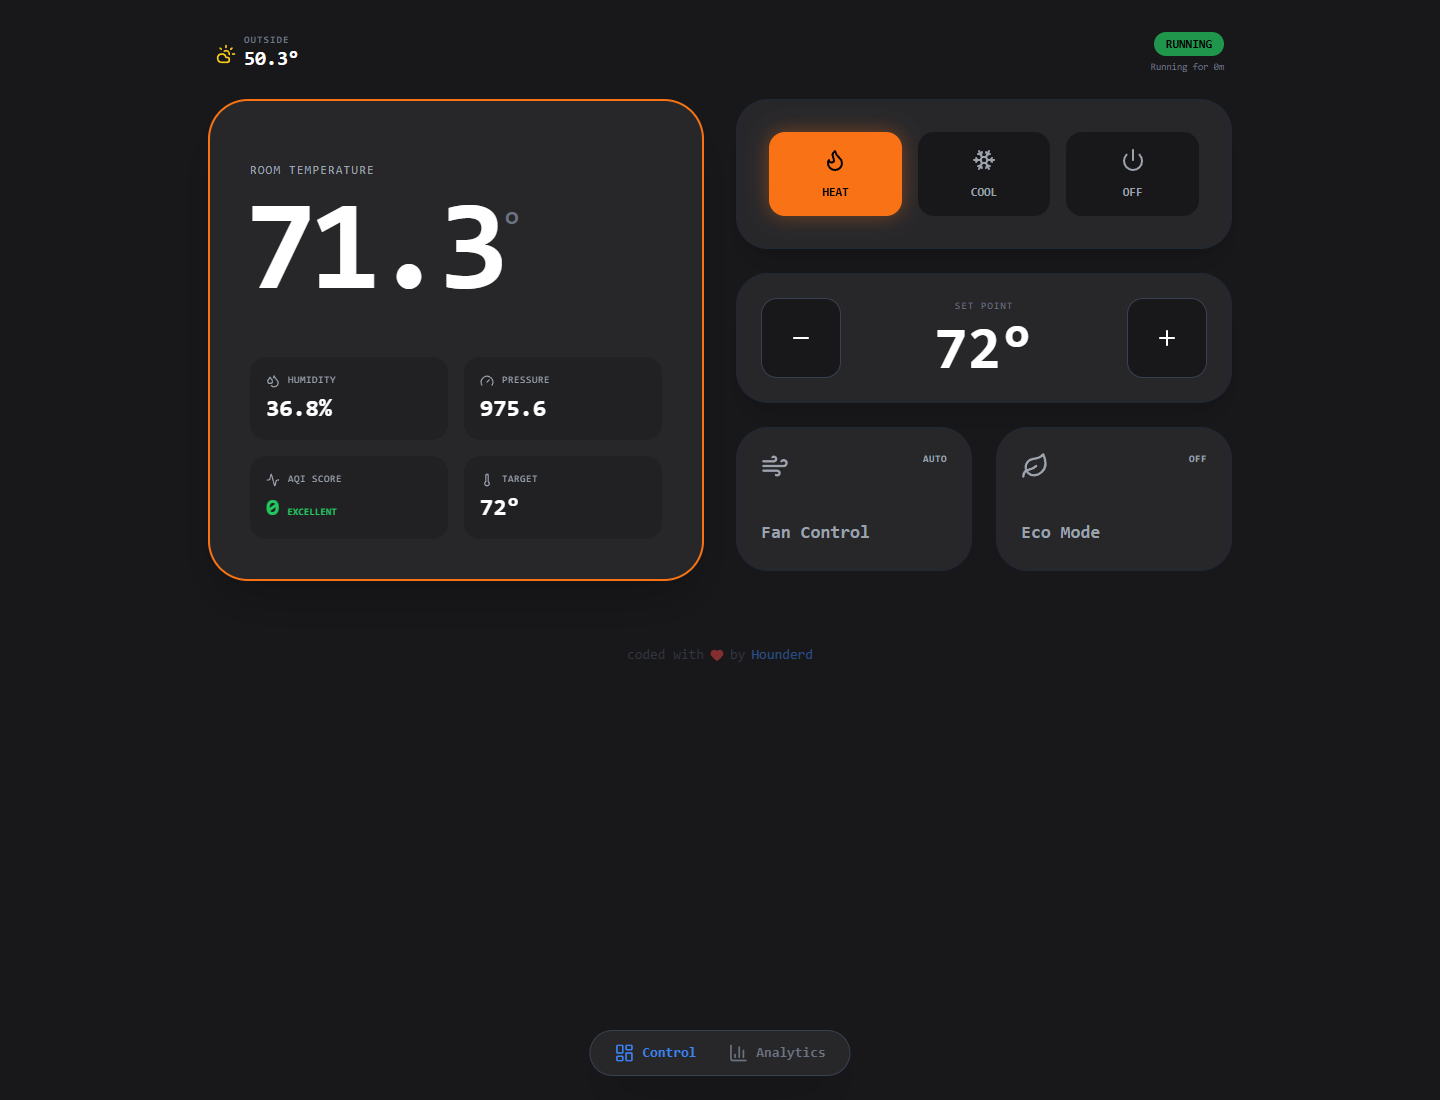



Here is the fully assembled smart thermostat, alongside the internal wiring and structural design.
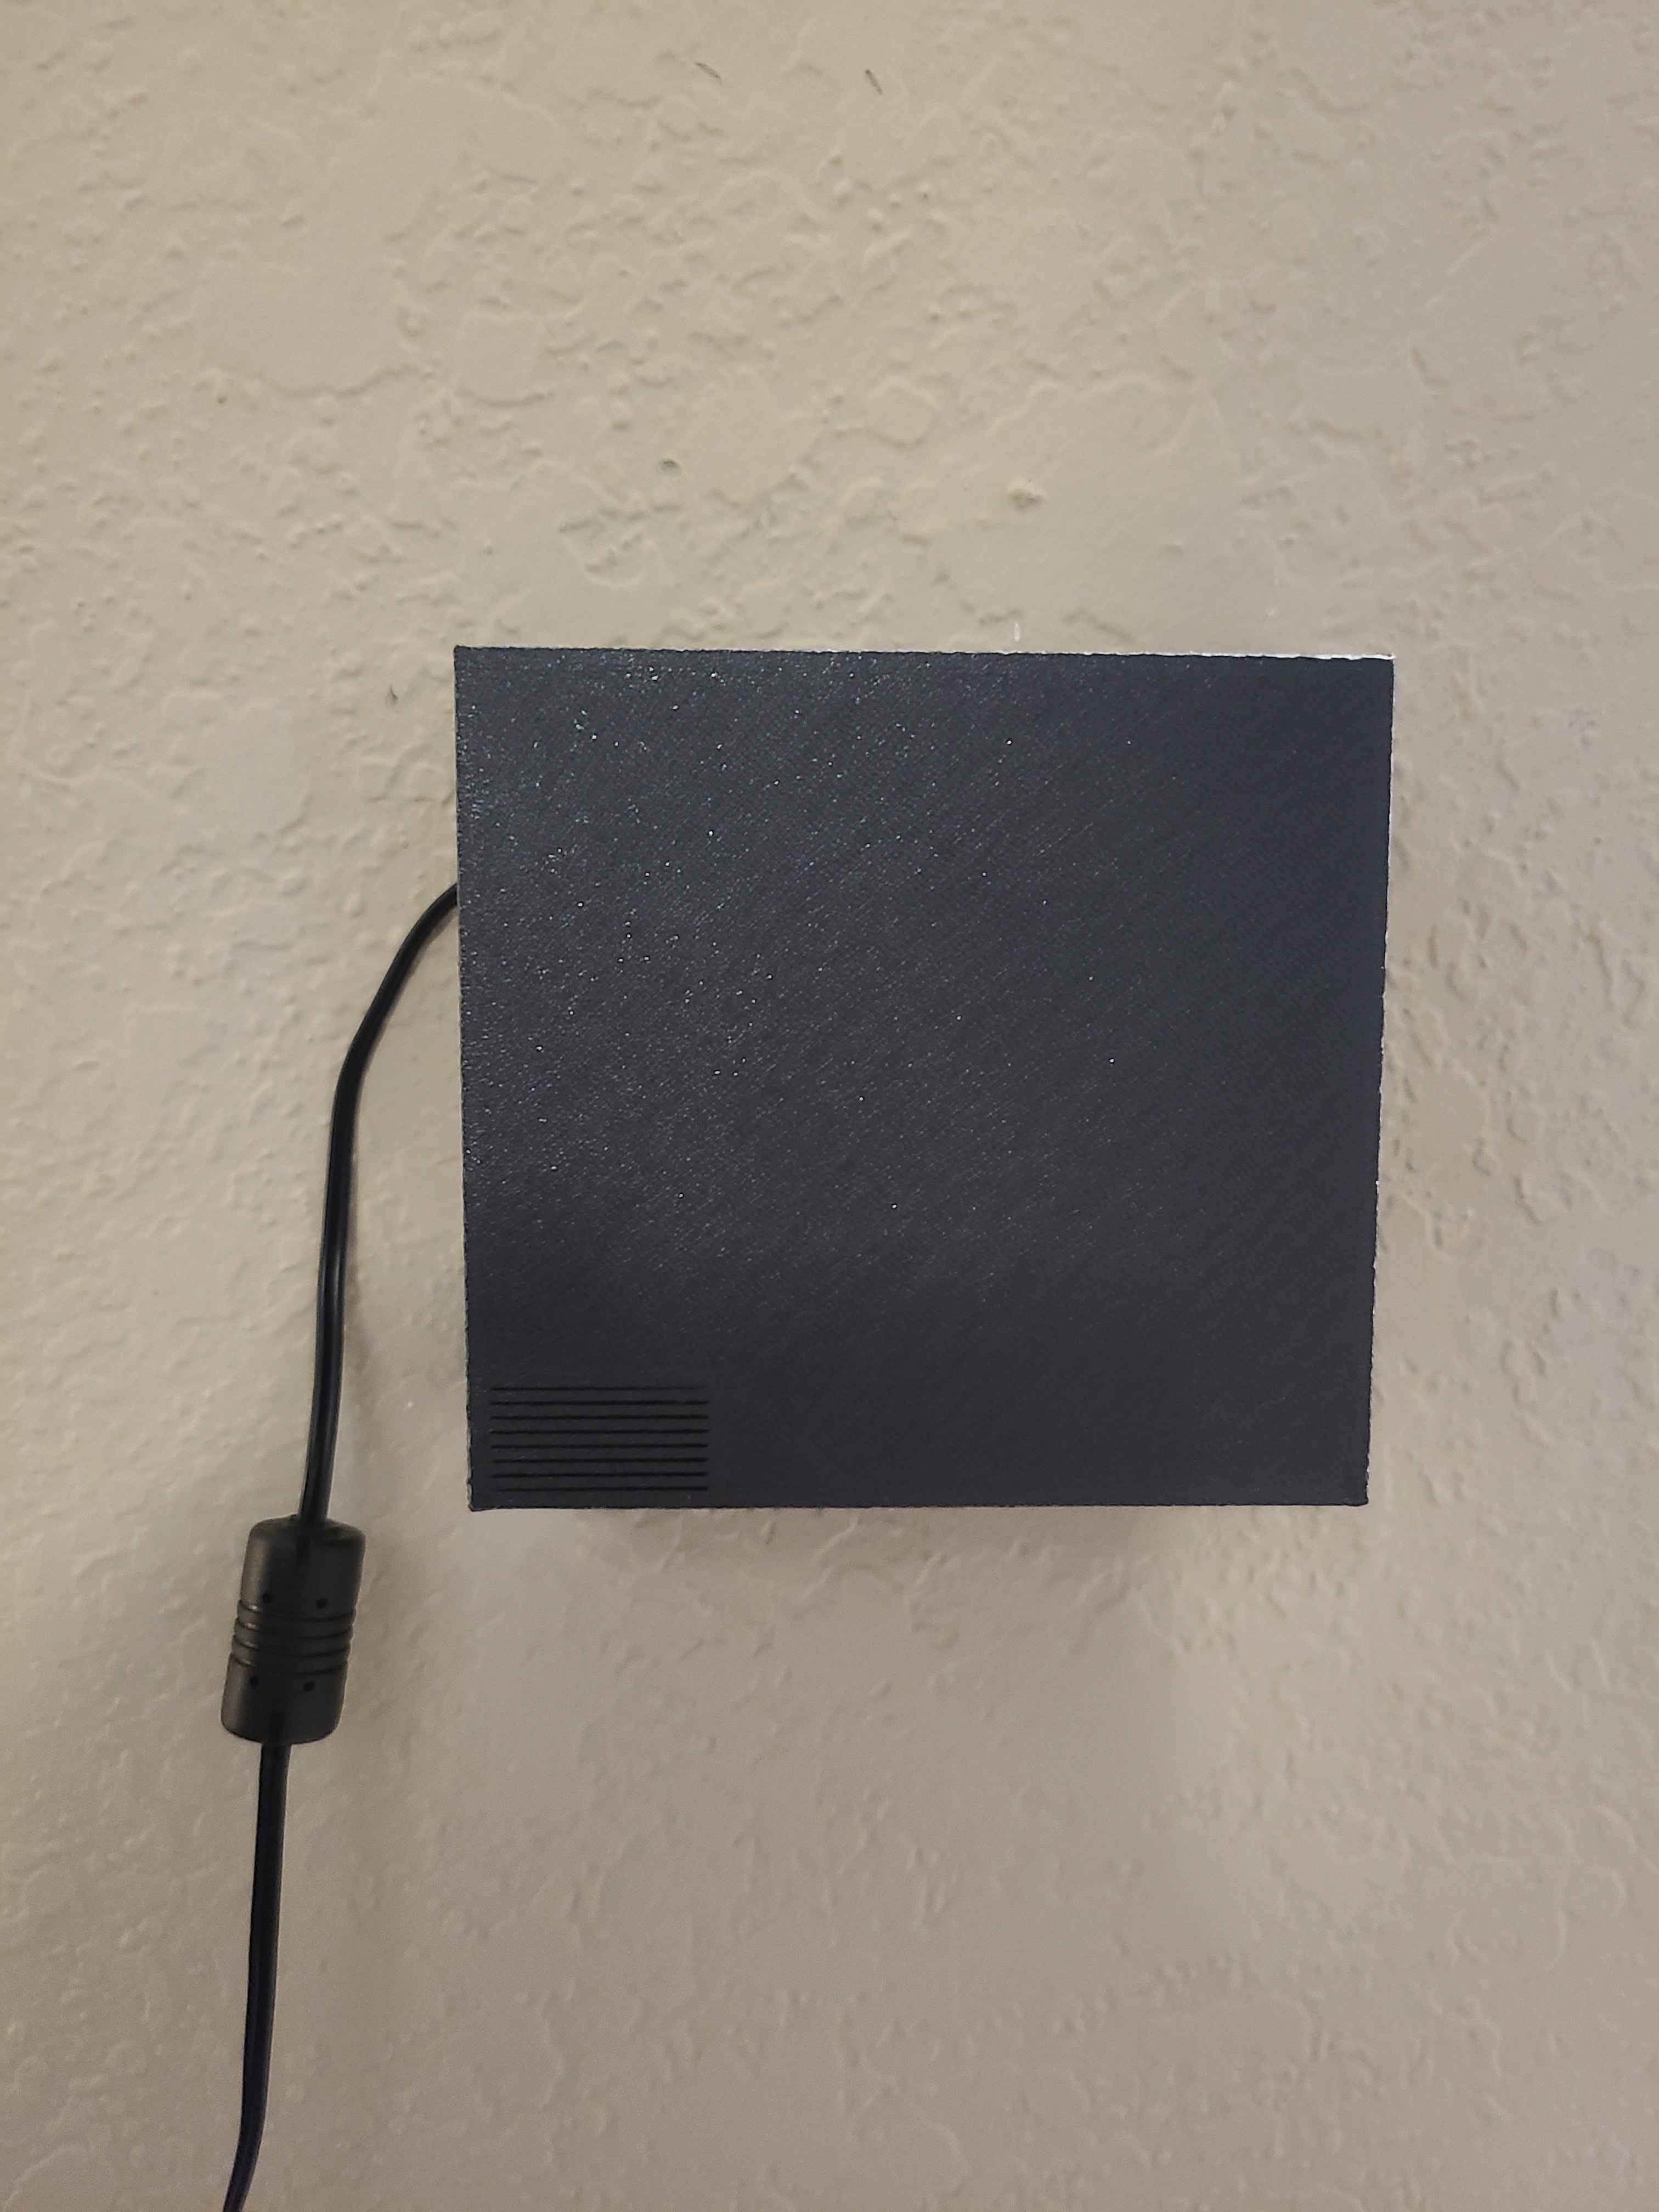
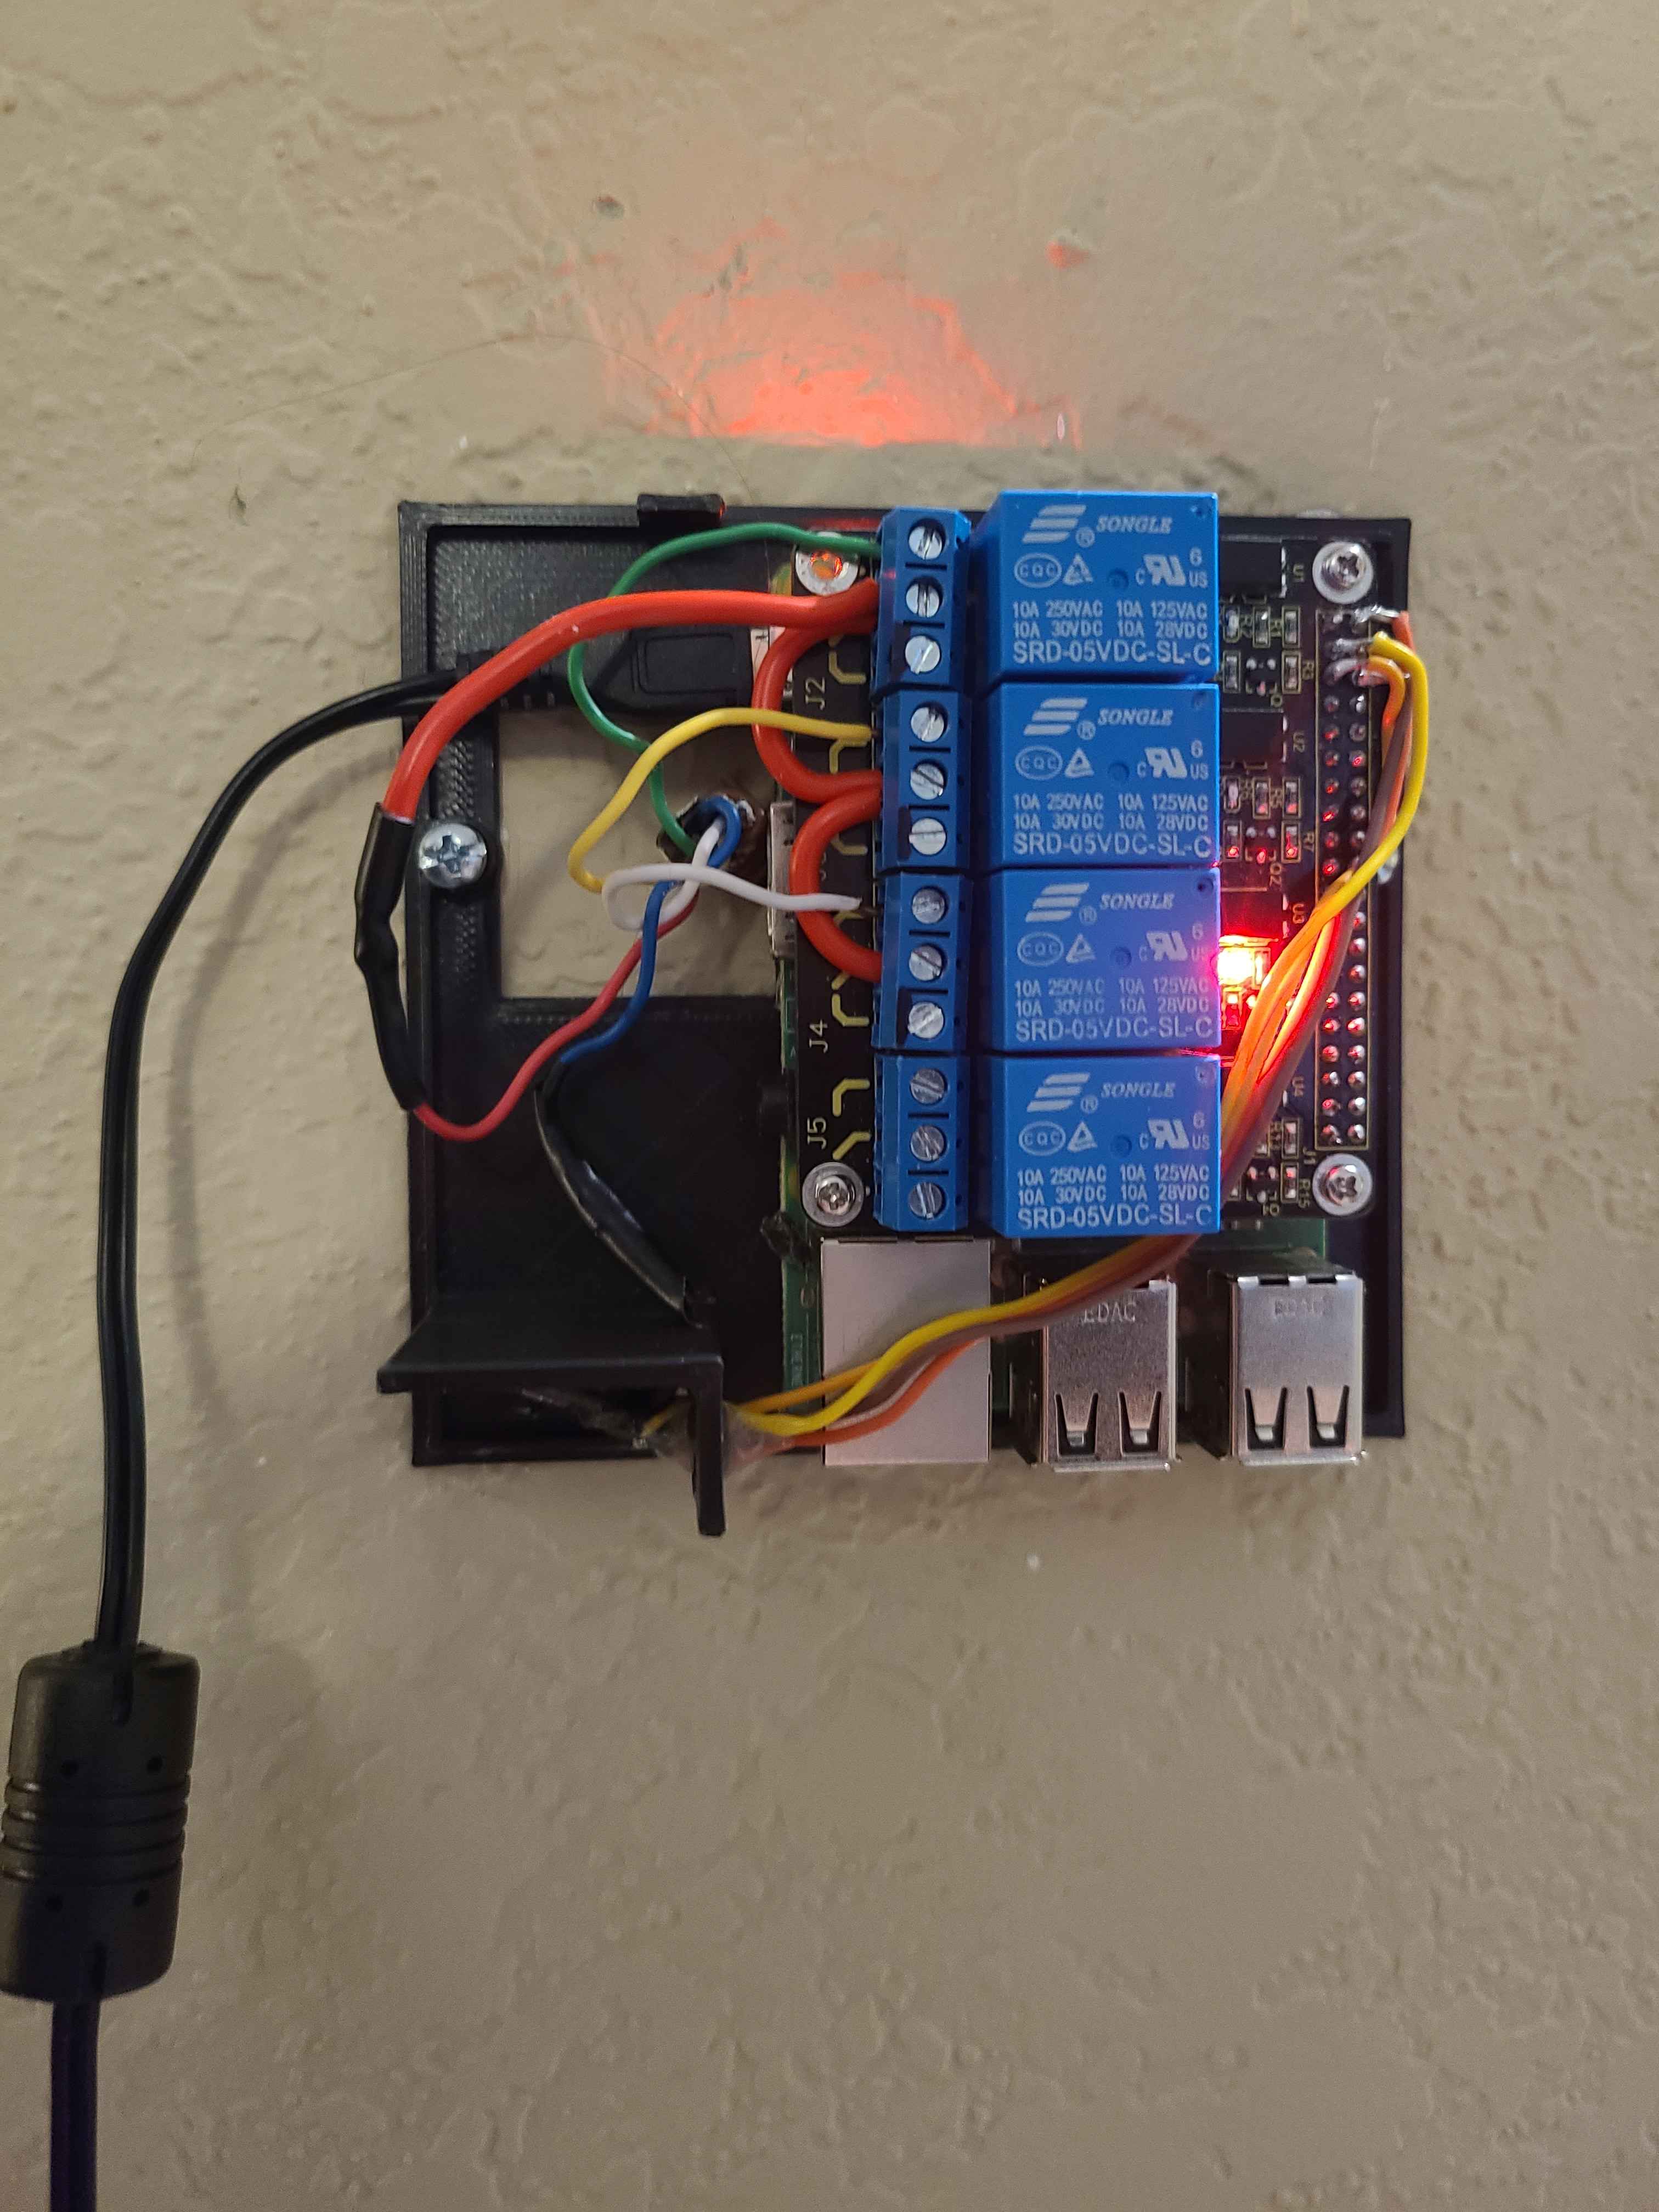
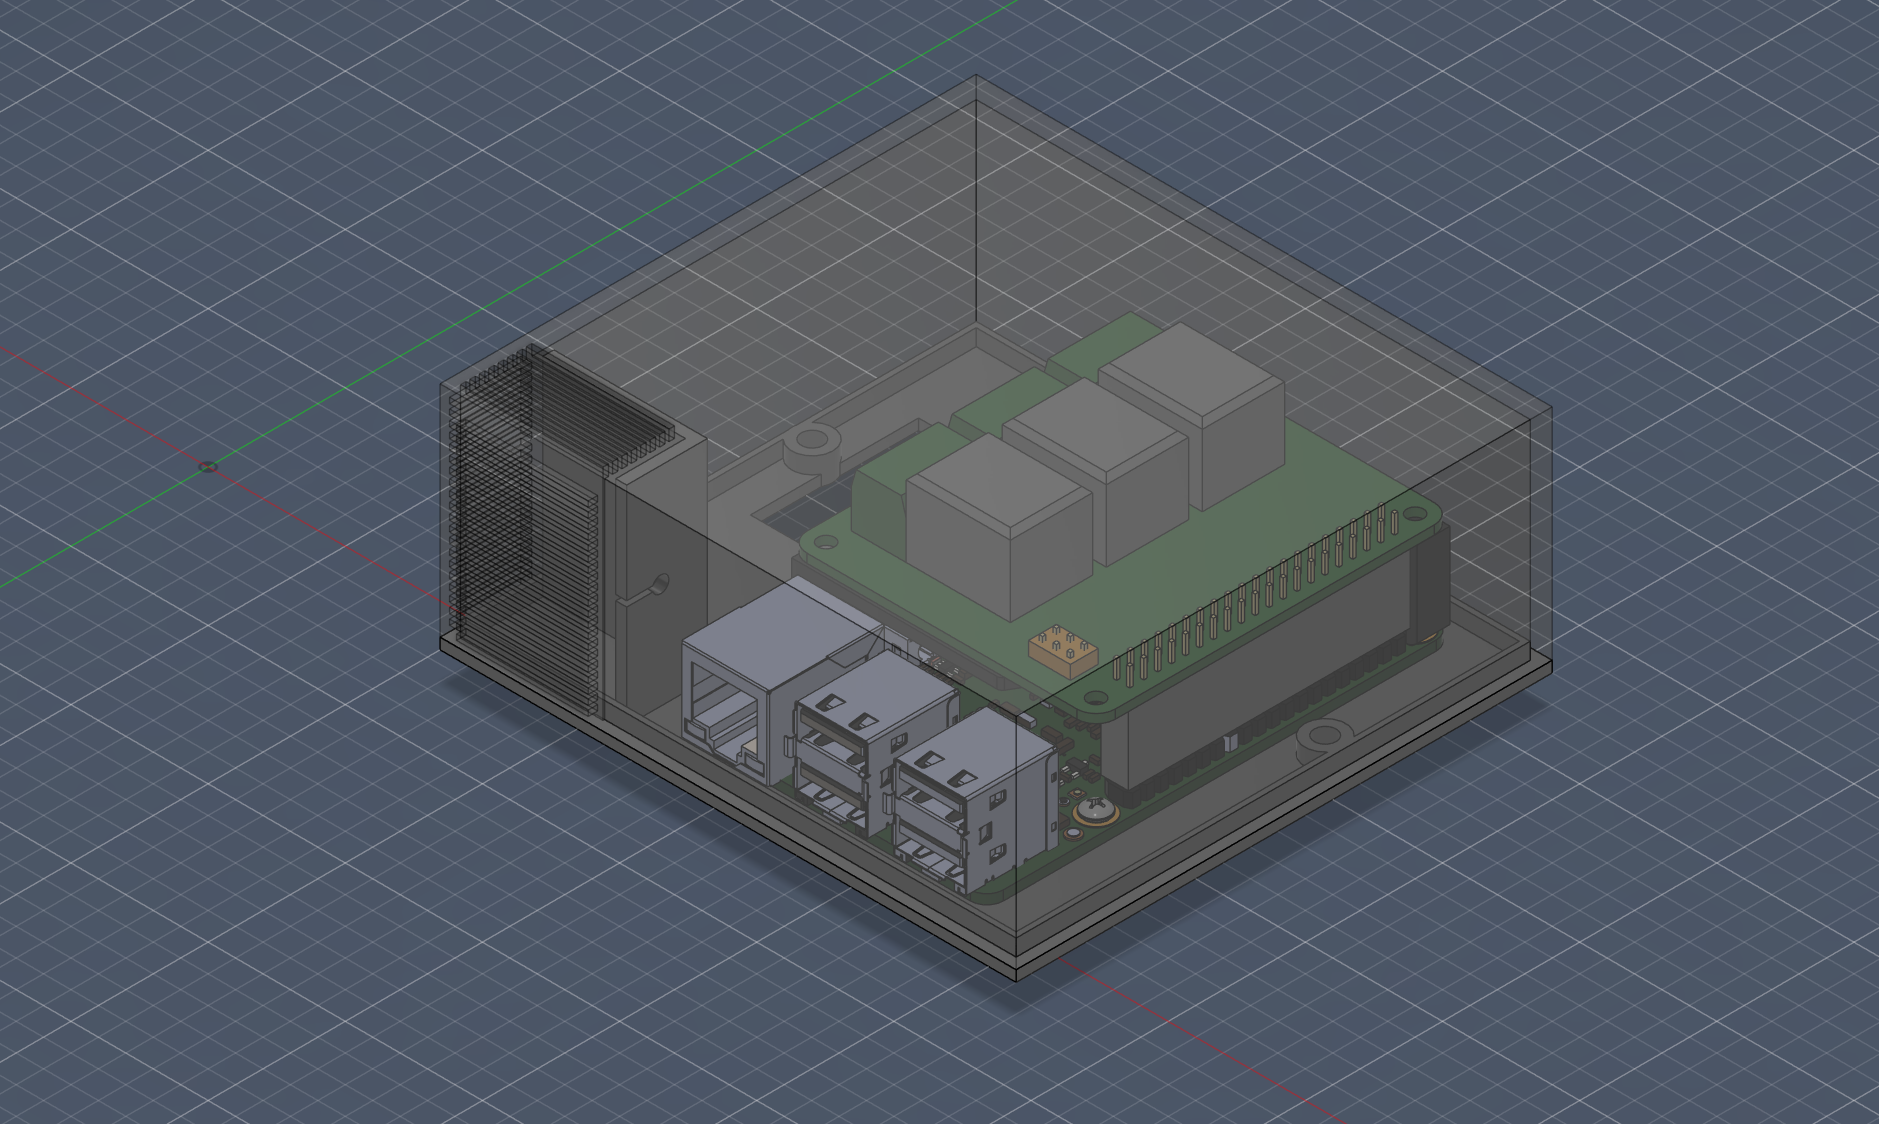
Custom 3D Printed Enclosure (download here)
A minimal 3D-printable case designed specifically to house the Raspberry Pi alongside the 4-channel relay hat.
Features
- Complete HVAC Control: Supports 24V heating and cooling control with a separate fan relay for manual fan-only circulation and low-temperature
FAN_COOLoperation. - Single-Target
AUTOMode: Automatically heats or cools around one target temperature using a configurable core deadband. - Safety First: Includes compressor short-cycle protection with a 5-minute cooling lockout.
- Eco Intelligence Engine:
- Weather Aware: Uses Open-Meteo to fetch local forecast data and adjust control behavior.
- Smart Hysteresis: Widens the temperature swing on mild days to reduce cycling.
- Heat Loss Analysis: Estimates thermal performance from runtime and outdoor conditions.
- Predictive Recovery: Pre-heats the home before wake-up time based on measured behavior.
- AUTO Changeover Delay: Prevents direct heat/cool family flip-flops in
AUTO. - AUTO Fan Cooling: When outside air is cool enough,
AUTOcan use the fan relay instead of the compressor and only fall back to compressor cooling if the temperature does not drop enough within a configurable window.
- Detailed Analytics & History:
- Logs HVAC events, temperature, humidity, pressure, gas, and outside temperature to local SQLite history.
- Provides configurable cost estimation for electric cooling and gas heating.
- Tracks filter life based on active HVAC runtime.
- Air Quality Monitoring: Supports the BME680 sensor for humidity, pressure, gas resistance, and IAQ calculations.
- Remote Sensors: Accepts external temperature sensor updates via REST for remote comfort control, with token auth, freshness checks, and outlier rejection.
- Operational Hardening: Supports idle-only Raspberry Pi auto reboot with status visibility in the Analytics dashboard.
- Modern UI: Responsive React dashboard with full local control and read-only external access.
Hardware Requirements
- Raspberry Pi: 3B+ or 4 recommended
- Relay Module: Keyestudio 4-Channel Relay Hat (or generic 5V relay module)
- Sensors (I2C):
- Adafruit BME680 for temperature, humidity, pressure, and VOC gas
- Adafruit ADT7410 (optional) for higher-precision temperature measurements
- Power Supply: 24VAC to 5VDC buck converter recommended so the Pi can be powered from the HVAC system's C-wire
Wiring Guide
Warning: HVAC systems use 24V AC. Touching the R (power) and C (common) wires together can short your transformer and blow a furnace fuse. Turn off the breaker before wiring anything.
Relay Mapping
| Relay Channel | GPIO Pin (BCM) | HVAC Wire Color | Function |
|---|---|---|---|
| Relay 1 | GPIO 4 | Green (G) | Fan relay |
| Relay 2 | GPIO 22 | Yellow (Y) | AC compressor |
| Relay 3 | GPIO 6 | White (W) | Furnace heat |
| COM Ports | - | Red (R) | 24V power source |
Relay Behavior
- Manual
COOL: Energizes only the cooling/compressor relay. The HVAC system's own blower logic handles air movement. - Manual
HEAT: Energizes only the heat relay. - Fan
ON: Energizes only the fan relay. FAN_COOL: Energizes only the fan relay as an energy-savingAUTOcooling path when outdoor air is cool enough.
Sensor Wiring (I2C)
- SDA -> GPIO 2
- SCL -> GPIO 3
- VCC -> 3.3V
- GND -> GND
Installation Guide
1. System Prep
Enable I2C on the Raspberry Pi:
sudo raspi-config
# Interface Options -> I2C -> Enable
2. Backend Setup
Clone the repository and install the Python dependencies:
git clone https://github.com/Hounderd/smart-thermostat.git
cd smart-thermostat

pip3 install fastapi uvicorn RPi.GPIO requests
pip3 install adafruit-circuitpython-bme680 adafruit-circuitpython-adt7410
3. Frontend Setup
Build the React application:
cd smart-thermostat
npm install
npm run build
The FastAPI server serves the built frontend directly from smart-thermostat/dist.
4. Process Management (PM2)
Using PM2 is recommended for both the HVAC logic loop and the API server:
sudo npm install -g pm2

# HVAC control engine
pm2 start thermostat.py --interpreter python3 --name thermostat

# FastAPI server
pm2 start "uvicorn api:app --host 0.0.0.0 --port 8000" --name thermostat-api

pm2 save
pm2 startup
Configuration
Most settings can be changed in the Analytics dashboard, or directly in settings.json:
{
  "cost_kwh": 0.14,
  "cost_therm": 1.10,
  "ac_kw": 3.5,
  "furnace_btu": 80000,
  "filter_max_hours": 300,
  "filter_current_hours": 0,
  "core_deadband": 0.5,
  "eco_hysteresis_mild": 3.0,
  "eco_hysteresis_strict": 0.5,
  "auto_fan_cool_enabled": true,
  "auto_fan_cool_max_outside_temp": 50.0,
  "auto_fan_cool_fallback_minutes": 10.0,
  "auto_fan_cool_min_drop": 0.5,
  "auto_changeover_delay_minutes": 2,
  "auto_heat_wait_max_outside_temp": 50.0,
  "auto_heat_wait_minutes": 15.0,
  "auto_heat_wait_min_rise": 0.5,
  "remote_max_delta": 15.0,
  "remote_sample_max_age_seconds": 300.0,
  "auto_reboot_enabled": false,
  "auto_reboot_hours": 24
}
Key Behavior Notes
AUTOuses the configuredcore_deadbandaround a single target temperature.- Remote sensors are trusted-average inputs once they pass auth, freshness, and outlier checks:
HEAT,COOL, andAUTOall use the average of the local and trusted remote readings.- If the remote sample is missing, stale, malformed, out of range, or rejected as an outlier, control falls back to the local sensor only.
AUTO Fan Coolingcan chooseFAN_COOLbelow the configured outside temperature threshold.- If
FAN_COOLdoes not reduce room temperature by at leastauto_fan_cool_min_dropwithinauto_fan_cool_fallback_minutes,AUTOfalls back to compressorCOOL. auto_changeover_delay_minutesblocks direct heating/cooling family swaps inAUTO.- Remote samples are ignored when they are stale, malformed, out of range, or differ from the local sensor by more than
remote_max_delta. - Automatic reboot waits until the HVAC is idle before requesting a full Raspberry Pi reboot.
Security & Access Control
The FastAPI app applies IP-based write protection:
- Local Network (
192.168.x.xor127.0.0.1): Full read/write control - External Network: Read-only access; status is visible but control changes are blocked
- Remote sensor updates:
POST /remoteis the only write path available externally. By default it requires anX-Remote-Tokenheader matching the server'sREMOTE_SENSOR_TOKENenvironment variable. For legacy hardware that cannot send headers, you can allow specific sensor IPs through theREMOTE_SENSOR_TRUSTED_IPSenvironment variable.
Created with love by Hounderd.